
How-To
How to Install a Security Camera: DIY Guide (2026)
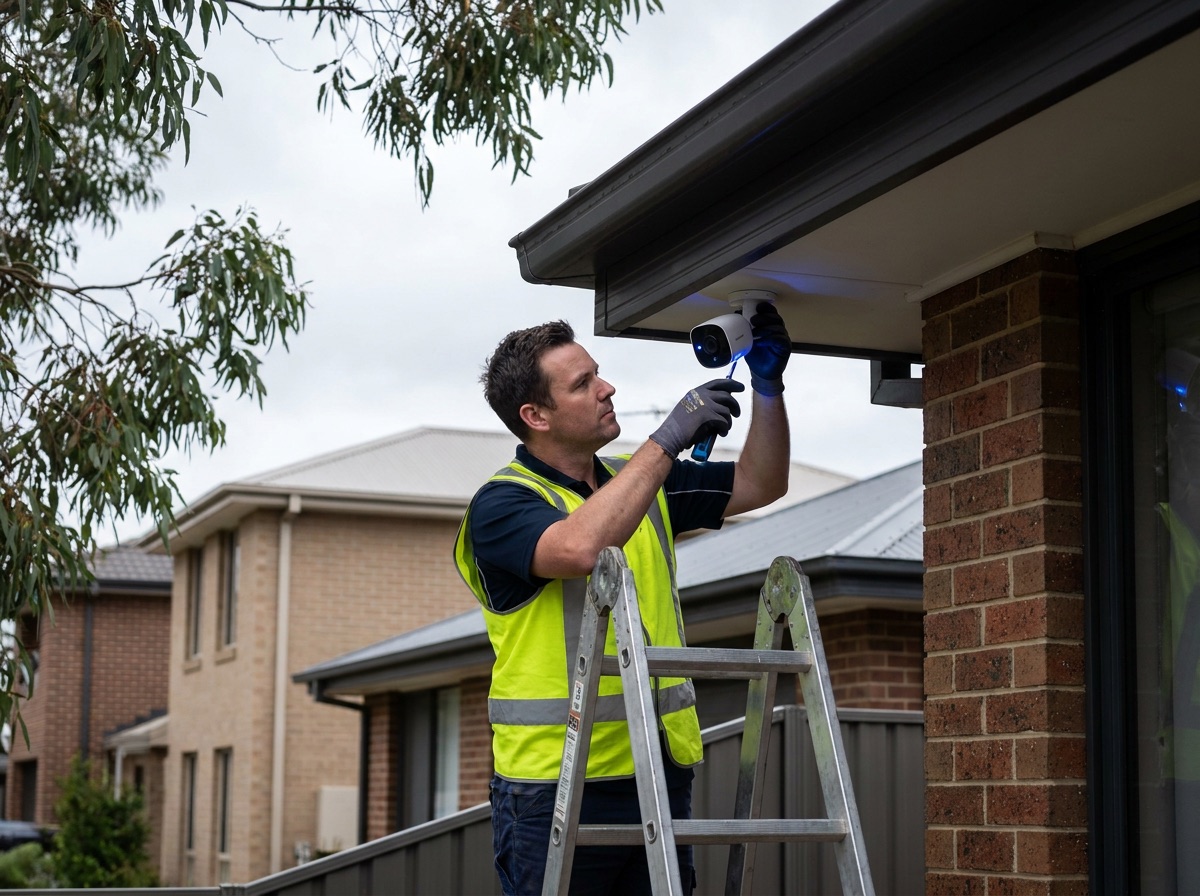
Everything you need to install your first security camera in under an hour. Wired PoE and wireless install steps, camera placement rules, and the mistakes DIYers make.
This guide compiles the exact install order used by licensed low-voltage installers, drawn from ONVIF specifications, manufacturer install documentation, OSHA ladder-safety guidance, and NFPA 70 wiring standards. Prices, tools, and steps are current as of July 2026. Guide updated: July 22, 2026.
Installing your first security camera looks intimidating. It doesn't have to be. If you can hang a picture frame and follow a wifi setup on your phone, you can install a security camera in under an hour. This guide walks you through both wired PoE and wireless install paths, plus what most DIYers get wrong. If you'd rather have someone else handle it, we cover when to hire a pro near the end.
Should you DIY or hire a pro?
Most homeowners can handle a single-camera or 2 to 4 camera install themselves. Where it gets harder is cable runs through walls, integration with existing alarm systems, or multi-story properties. Here is the honest decision framework.
| Situation | DIY | Hire a pro |
|---|---|---|
| Single wireless camera on the porch | ✓ | |
| 2 to 4 cameras with existing outlets | ✓ | |
| First-time install, no tools yet | ✓ (buy tools once) | |
| Running cable through walls or attic | possible | recommended |
| Wiring cameras with PoE cable | ✓ (if comfortable with ethernet) | |
| Retrofit into an existing alarm system | ✓ | |
| Commercial or multi-story install | ✓ | |
| Same-day guaranteed working setup | ✓ | |
| Certified install required for warranty | ✓ |
When in doubt, DIY the first camera as a test. If it goes smoothly, keep going. If you hit a wall (literally or otherwise), you can always call a pro for the harder cameras.
If you have questions about which cameras or accessories fit your specific install, contact our team and we will walk you through it.
Tools and materials needed
You do not need a full contractor kit. Basic homeowner tools plus a few camera-specific items.
For any camera install:
- Drill with masonry and wood bits
- Level
- Pencil
- Stud finder
- Screwdriver set (Phillips and flathead)
- Ladder or sturdy step stool
- Smartphone with the camera's app installed
For wired PoE installs, also add:
- Ethernet cable (Cat 5e or Cat 6, outdoor-rated for any run outside)
- RJ45 connectors and a crimping tool (or pre-terminated cables)
- Cable pulling rods or fish tape
- Silicone sealant or rubber grommets for cable entry points
- PoE switch or PoE injector
Not sure which cables and PoE gear to buy for your specific camera? Browse our security cameras and matching accessories to piece it together.
Choosing camera locations
Bad placement kills every camera install regardless of quality. This is the section most DIYers skip and then regret.
Height: 8 to 10 feet up. High enough that a person cannot reach and cover the lens. Low enough to capture faces, not just the tops of heads.
Angle: point 15 to 20 degrees downward. Not straight down (you get scalps and shoulders). Not straight ahead (you get sky and treetops).
Coverage priority zones
Cover in this order, camera by camera:
- Front door (most-used entry point, most-common package theft location)
- Driveway (car access, license plate capture)
- Back door and rear yard (second-most common entry point for burglary)
- Ground-floor windows (especially any not visible from the street)
- Detached garage or side gate (often overlooked)
- Backyard fence lines (deters property-line intrusion)
What to avoid
- Pointing directly at bright light sources. A camera facing west at sunset backlights every clip. Prefer east-facing morning and west-facing afternoon, or use cameras with real HDR handling.
- Mounting where trees or shrubs will grow into the frame. What is clear today is a leaf wall in 18 months.
- Locations without wifi signal (if wireless) or without conduit access (if wired). Check both before you drill.
- Direct rain hits without deep eave protection. Even IP65-rated cameras degrade faster in full weather exposure than under an overhang.
Do this before you buy anything: draw a top-down floor plan of your property. Mark front door, driveway, back door, garage. Every entry point should be visible from at least one camera. That is your minimum coverage.
Wired vs wireless install: which one for you
| Consideration | Wired (PoE) | Wireless (battery or WiFi) |
|---|---|---|
| Best for | Long-term, high-quality, always-on setups | Renters, first-time buyers, single-camera |
| Video quality | Up to 4K, no compression loss | Usually 1080p to 2K |
| Power source | PoE ethernet cable | Battery or nearby outlet |
| Reliability | Very high | Depends on wifi and battery |
| Install difficulty | Higher (cable runs) | Lower (no cable) |
| Cost per camera | $200 to $400 | $50 to $300 |
| Ongoing maintenance | Once every few years | Battery swaps every 6 to 24 months |
Rule of thumb: if you are building a full system now, go PoE. If you are testing the water with one camera, go wireless.
How to install a wired PoE security camera
Total time: 45 to 90 minutes for the first camera, faster after.
Step 1: Plan the cable run
Sketch the route from the camera location to the interior end point (an existing NVR, a PoE switch, or a PoE injector plugged into your router). Measure the length. Buy 15 to 20 percent more cable than the straight-line distance to account for corners, drops, and slack.
Step 2: Drill the mounting hole
Mark the camera location. Drill a hole for the cable to pass through the wall. For outdoor cameras, drill downward at a slight angle so rain cannot run into the hole.
Step 3: Run the cable
Pull the ethernet cable through the wall from the outdoor drill point to the interior end point. Use a fish tape or pulling rod. Leave 12 inches of slack at each end. You will thank yourself later.
Step 4: Mount the camera
Secure the mounting plate with anchors or screws. Use a level. Loose mounts always tell on themselves after the first windstorm.
Step 5: Connect the ethernet cable
If your cable is pre-terminated, plug it in directly. If you are crimping RJ45 connectors yourself, follow the T-568B wiring order: orange-white, orange, green-white, blue, blue-white, green, brown-white, brown. Both ends must match.
Step 6: Seal and weatherproof
Silicone the drill entry point or use a rubber grommet. Water is the number one killer of outdoor camera installs. Even better: create a drip loop with the cable so any water follows the low point down and away from the hole.
Step 7: Power up
Connect the interior end of the ethernet cable to the PoE switch or NVR. The camera light should turn on within 30 seconds. If nothing happens, check the cable ends first.
Step 8: Configure in the app
Open the NVR's app. Scan for new devices. Add the camera. Set motion detection zones and recording schedule. Every ONVIF-compatible camera works the same way once paired.
How to install a wireless (battery or WiFi) security camera
Total time: 15 to 30 minutes per camera. Simpler than wired, but wifi quality decides how well it actually works.
Step 1: Check wifi coverage
Stand where the camera will mount. Use a wifi analyzer app (free on both iOS and Android) to check signal strength. Anything below -70 dBm is trouble. Fix this before you drill.
Step 2: Fully charge the camera before mounting
Never install a partially charged camera. It just means you take it down within a week for a top-up.
Step 3: Complete app pairing before mounting
Do the wifi and app setup inside the house, while the camera is still on your kitchen counter. Pair it to your account. Set the wifi credentials. Test the live feed. Fix any pairing issues indoors, not on top of a ladder.
Step 4: Mount the camera
Same rules as wired: 8 to 10 feet high, 15 to 20 degrees downward angle.
Step 5: Test motion detection
Walk in front of the camera. Confirm a notification hits your phone within 5 to 10 seconds. If it does not, check the app's sensitivity settings.
Step 6: Set motion detection zones
Most apps let you mask out areas (a busy street, a swaying tree) to reduce false alerts. Do this on day one, not after 200 false pings have trained you to ignore the app.
Common installation mistakes
Fix these before you make them.
- Cable run through insulation without a conduit. Cable pinches over time, ethernet fails. Fix: use a plenum-rated conduit or fish tape through drywall cavity.
- No slack at the camera end. Camera cannot be re-aimed later without cutting drywall. Fix: leave 12+ inches of cable behind the mounting plate.
- Sealing the drill hole from outside only. Water still runs down the cable into your wall. Fix: create a drip loop below the hole entry point so water drops off before reaching the seal.
- Camera pointed into the sun. Backlight ruins every daytime clip. Fix: plan for morning east-facing and afternoon west-facing sun. Prefer north-facing eaves where possible.
- Password left as default. Every camera brand has been hacked because of this. Fix: change the password before mounting the camera.
- No local backup. Cloud alone means an intruder can cut your internet and blackout your footage. Fix: use an NVR with local storage.
- Skipping firmware updates. Security holes stay open for years. Fix: enable auto-updates in the app during initial setup.
- Working from a shaky ladder. Ladder falls are the most common DIY injury on camera installs. Fix: follow OSHA ladder-safety basics, three points of contact, ladder on stable ground, angle 4-to-1.
After installation: settings to turn on
Every install ends with this checklist. Skip it and you have half a security system.
- Change default admin password to something strong (16+ characters)
- Enable two-factor authentication on the app account
- Turn on encryption (many brands hide this in advanced settings)
- Enable auto firmware updates
- Set motion detection zones to avoid false triggers
- Set recording schedule (24/7 or motion-only, based on your storage)
- Enable notifications only for high-priority zones
- Set night mode to auto (not always-on IR, which reduces sensor life)
- Test emergency access: could someone else in your household disable the system from their phone?
- Download or export a copy of the config for your records
When to call a pro
DIY is the right call for most single-family homes with 2 to 6 cameras. Call a licensed installer when any of the following apply:
- Cable runs through masonry walls or stucco
- The install requires attic or crawlspace access
- You are integrating with an existing alarm panel
- You need a certified install for insurance or warranty
- You have more than 6 cameras or want commercial-grade wiring
- The property has more than one story with no existing conduit
- Local code requires low-voltage permits for camera systems (varies by city)
If you are not sure whether your setup is DIY-ready, contact our team and we can help you decide which route (and which products) fit your home.
Frequently asked questions
How long does it take to install a security camera?
A wireless camera takes 15 to 30 minutes if wifi is good. A wired PoE camera takes 45 to 90 minutes for a typical install with a 20-foot cable run. A full 4-camera PoE system takes 4 to 6 hours for a first-time DIYer, roughly half that for someone who has done it before.
Do I need an electrician to install a security camera?
No. Camera installs use low-voltage wiring (12V or PoE) that does not require a licensed electrician in most US jurisdictions. If you need to add a new 120V outlet for a PoE injector or a floodlight camera, hire an electrician for that step only. Everything else you can do yourself.
How high should a security camera be mounted?
8 to 10 feet is the sweet spot. High enough that a person cannot reach the lens without a ladder. Low enough to capture faces, not just the tops of heads. Aim 15 to 20 degrees downward for the best coverage of the person walking toward the camera.
Do I need to drill holes for a security camera?
For wired cameras, yes. For wireless cameras with adhesive or magnetic mounts, no. Renters often skip drilling and use outdoor-rated command strips or magnetic mounts. Screws hold better long-term, but adhesive works for a lightweight wireless camera in a covered spot.
Can I install a security camera outside without an outlet nearby?
Yes. Three options. First, run ethernet cable and use PoE for both power and data. Second, use a battery-powered wireless camera. Third, use a solar-powered wireless camera for spots with good sun exposure.
What if my wifi signal is weak where I want to mount the camera?
Three fixes. Add a wifi mesh node closer to the camera. Use a wifi extender. Or switch to a PoE wired camera that does not rely on wifi for either power or reliability. The wired path removes wifi from the equation entirely.
Will installing a camera myself void the warranty?
For most consumer brands (Ring, Blink, Wyze), no. For some commercial-grade brands, DIY install can void weatherproofing certification if you drill the housing or bypass the sealed cable gland. Check the manufacturer's warranty terms before you drill anything.
Do security cameras need internet to work?
PoE cameras with a local NVR record without internet. They just lose remote-app access until internet returns. Wireless and battery cameras need wifi to reach your phone, but many can still record locally to a Sync Module or SD card if the internet drops.
Recommended products for DIY install
Two paths depending on how much you want to build yourself.
Single 4K camera to start with: the Uniview IPC2128SR3. 4K PoE bullet, IP67 weatherproofing, 100-foot night vision, ONVIF-compatible. Around $270 (approximate, as of July 2026). This is the camera to install first if you have never done a security camera install before. If it works out, add more of the same over time.
Build the full system your way: browse our security cameras and pick the cameras and NVR that fit your property. Pair with the accessories you need (PoE cables, mounting brackets, junction boxes, weatherproof grommets).
Any ONVIF-compatible camera and NVR from our catalog supports the DIY install steps in this guide. If you get stuck partway through, contact our team for help.